To crop a video, open it in an editor with a crop tool, choose the part of the frame you want to keep (often a preset ratio such as 9:16 or 1:1), and export a new file. The quickest free way is a browser tool: ChatCut’s video cropper lets you pick a ratio and position the crop, then saves an MP4 on your device without uploading it. On an iPhone or Mac, the Photos app can crop video; on Windows, Clipchamp can; and FFmpeg does it with one filter.
Cropping and resizing are often mixed up. Cropping cuts away the edges and keeps the remaining pixels as they are. Resizing changes the frame’s dimensions, which means either scaling the picture and adding black bars, or scaling it and cutting the edges. We turned the same 8-second, 1920 × 1080 talking-to-camera clip (5.1 MB) into a vertical 9:16 video every way below; the numbers come from that test, checked on November 18, 2026.
Key takeaways
- Crop when you want to remove something at the edge or reframe a shot. A 9:16 crop of our 1920 × 1080 clip was 606 × 1080 pixels.
- Resize when a platform wants exact dimensions such as 1080 × 1920. Choose whether to keep the whole picture (black bars) or fill the frame (edges cut).
- Cropping doesn’t add detail. Fill-frame resizing scaled our 606-pixel-wide crop up to 1080 pixels wide; it looks larger, not sharper.
- The crop doesn’t follow the subject. Every free method here uses one fixed position for the whole clip, so watch the full result.
- Crop keeps the length and the sound. Only the picture changes.
Crop or resize? What each one gave us
Here is the same frame from four files: the original, ChatCut’s crop tool at 9:16, and the ChatCut resizer at 1080 × 1920 in both fit modes.
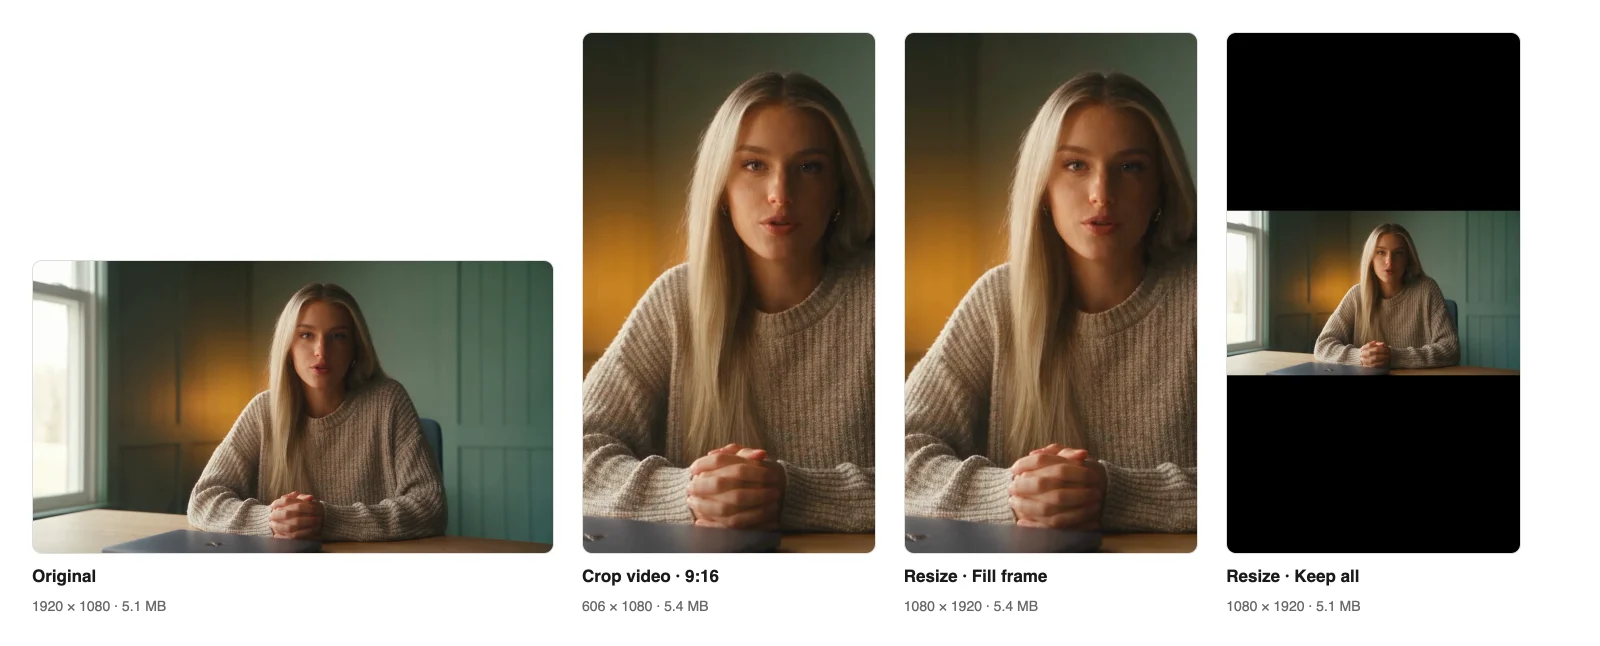
| Result | Tool and setting | Dimensions | Size | What happens to the picture |
|---|---|---|---|---|
| Crop | Crop video, 9:16, centered | 606 × 1080 | 5.4 MB | Sides removed, remaining pixels kept at their original resolution |
| Resize, fill | Resize video, 1080 × 1920, Fill frame | 1080 × 1920 | 5.4 MB | Sides removed, then scaled up about 1.8× |
| Resize, fit | Resize video, 1080 × 1920, Keep all | 1080 × 1920 | 5.1 MB | Whole picture kept, black bars above and below |
Two things stood out. The cropped file was bigger than the original (5.4 MB vs 5.1 MB), even though it has a third of the pixels, because the browser tools encode at a fixed, generous bitrate. And Fill frame and the centered crop show exactly the same part of the scene. Choose the crop when you want to place the frame yourself or keep the original pixels; choose Fill frame when an app insists on 1080 × 1920.
Method 1: Crop in your browser (any computer)
ChatCut’s free crop video tool runs in the browser tab, so the recording stays on your device. It accepts MP4, MOV and WebM files up to 5 minutes, 500 MB and 4K.
- Choose the video and a ratio. The options are 1:1, 9:16, 16:9 and 4:5.
- Position the crop. Two numbers place it: horizontal (0 = left edge, 100 = right edge) and vertical (0 = top, 100 = bottom). 50 centers it. On an axis with no spare room, the number has no effect: a 9:16 crop of a wide clip already uses the full height, so only the horizontal value matters.
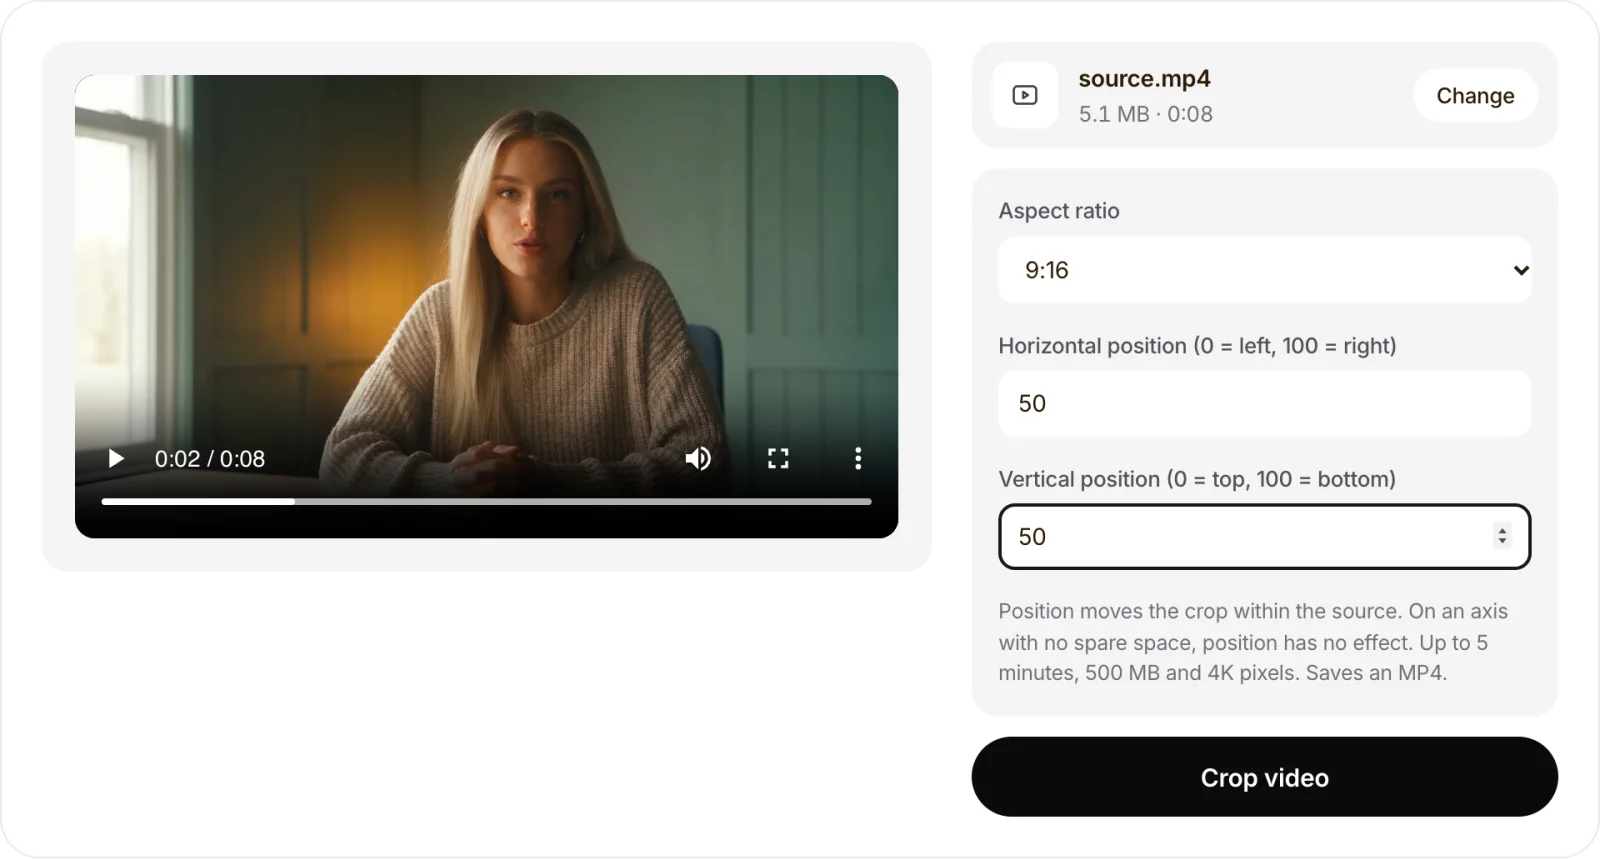
Our speaker sits near the middle of the shot, so 50 worked. We also tried 38, which moved the crop to the left; her face ended up against the right edge and part of it was cut off. If the person is off-center, move the number a few steps at a time and export again.
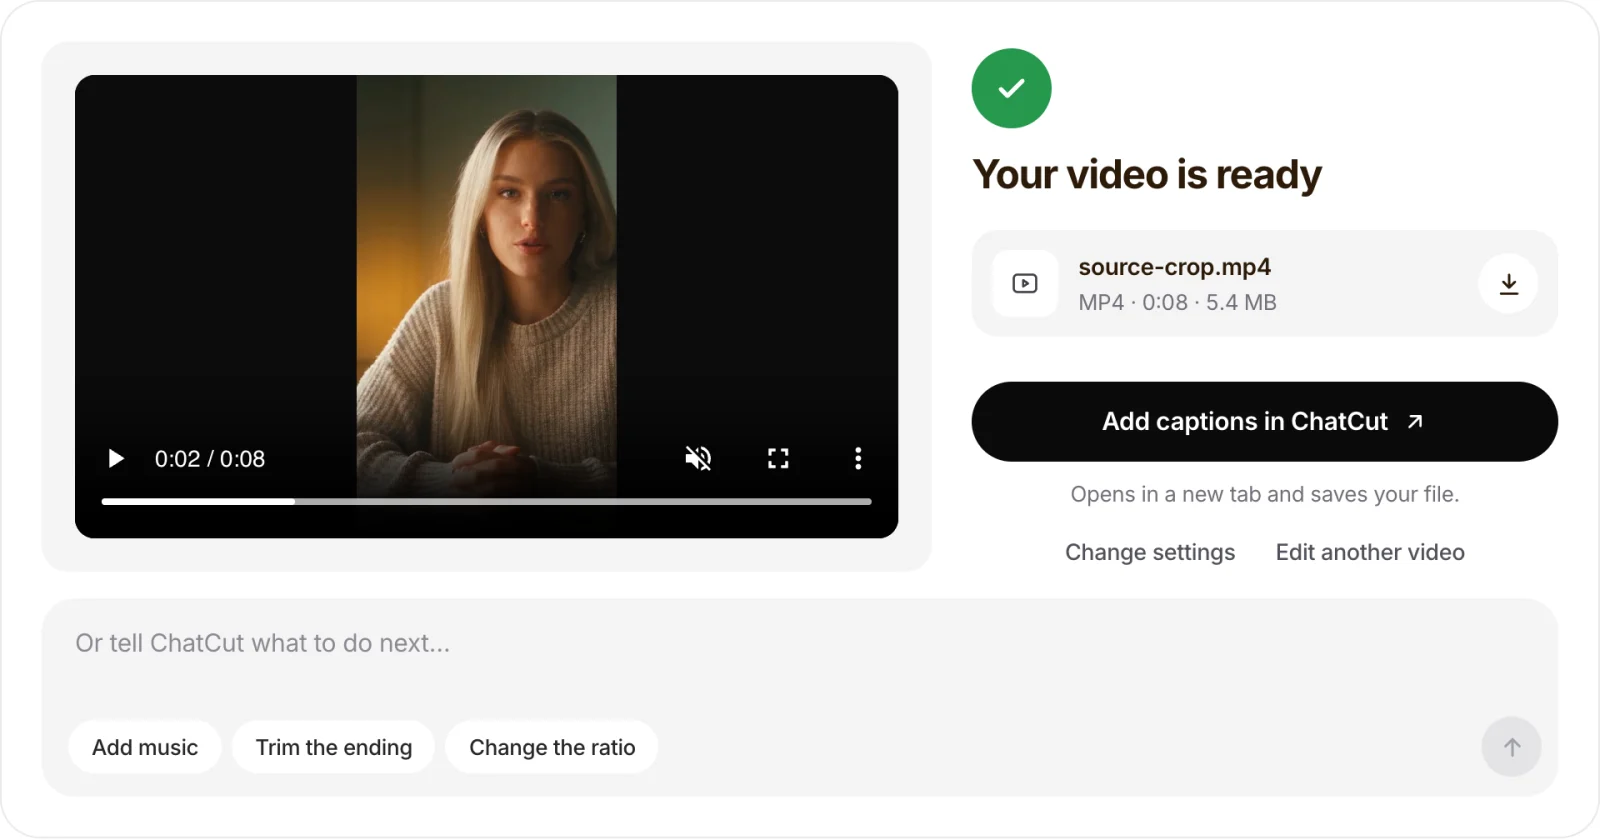
- Crop, check and download. Press Crop video. Ours finished in about a second. The result preview starts muted; unmute it to confirm the sound is still there (it is: the tool keeps supported audio).
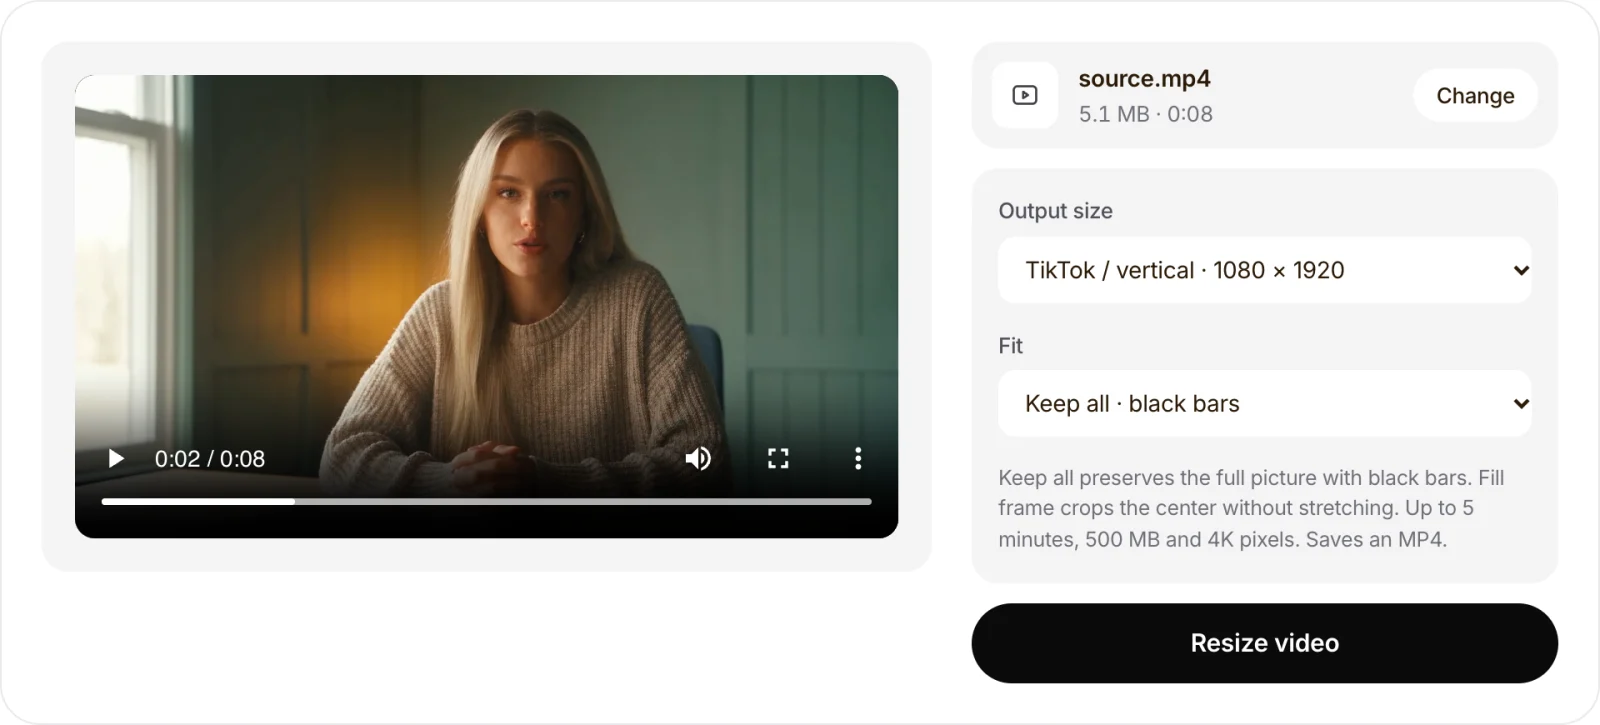
If you need exact output dimensions instead, use the video resizer. It has four presets (1080 × 1920, 1920 × 1080, 1080 × 1350 and 1080 × 1080) and two fit modes: Keep all adds black bars, Fill frame crops the center. Fill frame has no position control, so use the crop tool first if your subject is off-center.
Method 2: iPhone or iPad (Photos app)
- Open the video in Photos and tap Edit.
- Tap the Crop tool.
- Tap the aspect ratio button and pick a preset such as Square or 9:16, or drag the corners of the frame freely.
- Drag the video inside the frame to position it, then tap Done.
Apple’s iPhone guide to editing photos and videos covers the crop tool and its preset ratios; iDownloadBlog’s walkthrough shows the video screens. Labels can move slightly between iOS versions. The crop is saved as an edit in your library, and Revert brings back the full frame.
Method 3: Photos on a Mac
- Double-click the video in Photos, then click Edit.
- Click Crop in the toolbar.
- Pick a ratio in the sidebar (for example Square, 16:9 or Custom, where you type your own ratio such as 9:16) or drag the selection rectangle.
- Click Done, then use File → Export to save a copy.
Steps from Apple’s Photos for Mac guide. QuickTime Player can trim and rotate video, but it has no crop tool.
Method 4: Clipchamp on Windows
Clipchamp has two separate controls, which map neatly onto crop vs resize:
- Crop: select the clip on the timeline, choose Crop in the floating toolbar, and drag the corner or side handles in the preview.
- Change the shape of the whole video: click the aspect ratio button under Export and pick a ratio such as 9:16. Then use Fill to cover the frame (edges cut) or Fit to show the whole picture (black bars).
Steps from Microsoft’s guides to cropping in Clipchamp and changing the aspect ratio. Menu names can differ slightly between Clipchamp versions.
Method 5: FFmpeg (exact pixels, any system)
FFmpeg’s crop filter takes width:height:x:y, where x and y are the top-left corner of the area to keep. If you leave out x and y, it centers the crop. These are the commands we ran on our clip:
# Centered 9:16 crop, audio copied: 606 x 1080, 1.3 MB
ffmpeg -i input.mp4 -vf "crop=606:1080" -c:a copy vertical.mp4

# Same crop, 500 pixels from the left edge: 606 x 1080, 1.1 MB
ffmpeg -i input.mp4 -vf "crop=606:1080:500:0" -c:a copy vertical-left.mp4

# Square crop from the center: 1080 x 1080, 1.8 MB
ffmpeg -i input.mp4 -vf "crop=1080:1080" -c:a copy square.mp4

# Resize to 1080 x 1920, keep everything, black bars: 0.85 MB
ffmpeg -i input.mp4 -vf "scale=1080:1920:force_original_aspect_ratio=decrease,pad=1080:1920:(ow-iw)/2:(oh-ih)/2" -c:a copy fit.mp4

# Resize to 1080 x 1920, fill the frame by cutting the sides: 3.0 MB
ffmpeg -i input.mp4 -vf "scale=1080:1920:force_original_aspect_ratio=increase,crop=1080:1920" -c:a copy fill.mp4
The width and height should be even numbers for H.264. A ratio formula such as crop=ih*9/16:ih works too; our FFmpeg 8.1 rounded it to 608 × 1080. FFmpeg’s files were much smaller than the browser tool’s because its default encoder setting aims at a quality level rather than a fixed bitrate. The crop filter documentation lists every option.
Check it before you share it
These are the problems we’ve seen in real crops:
- The subject drifts out of frame. The crop stays in one place for the whole clip. Scrub through the result, especially moments when the person leans, gestures or walks. Use a wider ratio, move the position, or split the clip and crop each part.
- Burned-in captions or a logo got cut off. Text that’s part of the picture is cropped like everything else. Add captions after cropping instead, for example with the captions generator.
- The crop looks soft on a big screen. A 9:16 crop of 1080p footage is only 606 pixels wide. That’s fine on a phone, but scaling it up won’t add detail. Shoot in 4K if you plan to crop to vertical.
- The file got bigger. Our 606 × 1080 crop was 5.4 MB from a 5.1 MB source. Run it through the video compressor if size matters; how to make a video smaller explains the settings.
- It looks stretched. None of the methods here stretch the image unless you type mismatched numbers into a scale command. If the result looks squashed, check that the scale or crop width and height match the ratio you wanted.
- You thought it would be shorter. Cropping changes the picture, not the time. To cut the length, use the video trimmer.
What to do next
- Add captions. Captions help when people watch with the sound off; add word-by-word subtitles with the captions generator.
- Add text or a title. Put a headline in the space above or below the speaker with add text to a video.
- Make several shorts from one long video. If you’re cropping a long landscape recording into vertical clips, ChatCut’s AI clip maker can find the strongest moments and cut them for you.